
Standard Toilet Dimensions
Home – Standard Toilet Dimensions
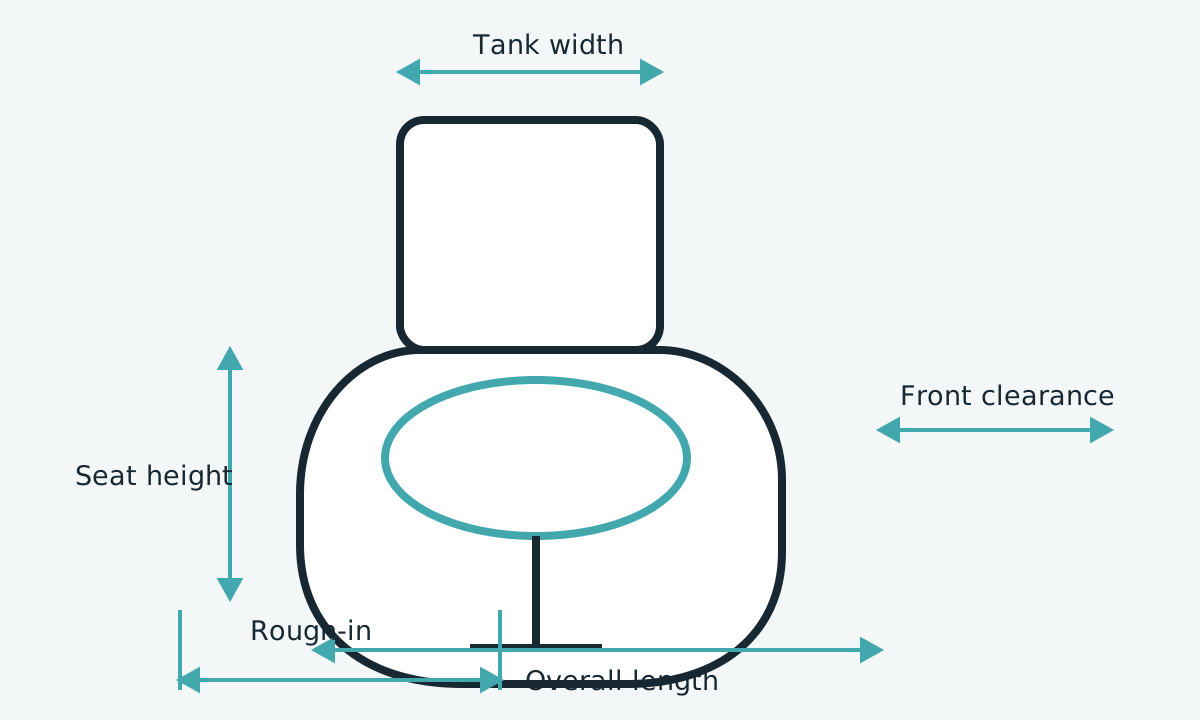
Common toilets are roughly 27–32 inches deep, 14–20 inches wide and 27–32 inches high, but model drawings control the fit.
Direct Answer
Common toilets are roughly 27–32 inches deep, 14–20 inches wide and 27–32 inches high, but model drawings control the fit.
| Dimension | Common reference range | What to verify |
|---|---|---|
| Overall depth | 27–32 in (686–813 mm) | Front clearance and door swing |
| Overall width | 14–20 in (356–508 mm) | Side clearance to the fixture centerline |
| Overall height | 27–32 in (686–813 mm) | Tank clearance below shelves or trim |
| Seat height | 15–17 in standard; 17–19 in accessible applications | Finished-floor height on the model drawing |
Which toilet dimensions matter?
Record overall depth, maximum width, tank height, bowl rim height and seat height. Overall depth determines front clearance; maximum width affects side obstructions; tank height affects shelves and trim.
How to measure the available space
Measure from the finished wall, not the baseboard. Mark the closet-bolt center, the nearest side obstruction and the front boundary. Compare every measurement with the product drawing.
Nominal size is not actual size
Names such as compact, comfort height or elongated do not provide a complete dimension set. Two toilets with the same 12-inch rough-in can project differently into the room.
Before you buy
Use the measurements above as a planning screen. The exact manufacturer specification and installation drawings, finished-site conditions and applicable local requirements remain decisive.
Fit-check workflow
1. Measure finished surfaces. 2. Record the model number. 3. Compare the manufacturer drawing. 4. Check clearances and moving parts. 5. Save the dated source.
Measure the Real Standard Toilet Dimensions
Record overall depth, maximum width and tank height from the finished reference surfaces that control this page.
Start with the decision
The purpose of this the complete toilet envelope review is to translate overall product dimensions into a reliable room-fit check. Begin by writing down what must remain unchanged in the room, which parts of the project can still move, and who will approve the final installation. A measurement is useful only when its reference surface and direction are clear.
Build a complete dimension map
Treat the complete toilet envelope as a three-dimensional envelope, not a single catalog number. Record overall depth, maximum width, tank height, rim height, seat height and wall-to-front projection on one field sheet. Label every value with its start point, end point and unit, and identify whether it was measured from a finished wall, floor, deck, opening or product centerline.
Use a repeatable field sequence
Measure in the same order every time. First confirm that construction around the the complete toilet envelope is complete enough to expose the true reference surfaces. Second, photograph the area without the tape in place. Third, capture overall depth and maximum width, then verify them with a second pass from the opposite direction when possible. Continue with tank height, rim height and the remaining clearances. Finally, place the notes beside the photograph and date the record.
Test The Complete Toilet Envelope in the Room
Check the measured envelope against tank lid removal, nearby vanity edge and every moving or service condition nearby.
Record the surrounding envelope
A product can match its headline dimension and still fail because the room around it was not documented. Map tank lid removal, nearby vanity edge, door casing, toilet-paper holder, rear supply valve and sloping floor. Note which items are fixed, which can be relocated and which move during normal use. Draw door, drawer, handle and panel arcs at their maximum travel.
Scenario: Compact round-front replacement
For a compact round-front replacement, preserve the existing room facts before comparing new products. Photograph the current arrangement, record all six key measurements and identify any finish that will be added or removed. Then compare at least two candidate drawings on the same scale. The question is not merely whether the product can be positioned; it is whether tank lid removal, nearby vanity edge and door casing remain usable after installation.
Scenario: Comfort-height elongated model
A comfort-height elongated model often creates more design freedom, but it also introduces more opportunities for assumptions. Freeze the finished reference surfaces, then coordinate overall depth, rim height and wall-to-front projection with plumbing, electrical work, backing and finish thickness. Review the candidate product before openings or supports become expensive to move. If the supplier drawing changes, mark the revision date on the field sheet and repeat the affected comparison.
Verify the Exact Product
Match the field record to the current dimensioned side elevation and dimensioned plan view before the purchase or installation decision.
Scenario: One-piece toilet
For a one-piece toilet, separate user needs from product labels. Translate the requirement into physical checks such as maximum width, seat height, operating reach and uninterrupted approach space. Then test the complete room arrangement, including toilet-paper holder and rear supply valve. A label such as compact, comfort, accessible, universal or professional does not replace a dimensioned plan. Where accessibility or code compliance matters, use the applicable adopted requirements and qualified project review.
Scenario: Wall-adjacent powder room
A wall-adjacent powder room should begin with a difference list. Identify which measurements, connections, supports and service points can change compared with the existing condition. Check tank height and wall-to-front projection even when the new item appears to share the old product's nominal size. Small geometry changes can move an edge, handle, outlet or connection into conflict with nearby vanity edge or sloping floor.
Separate nominal and actual size
Nominal names are useful for browsing, but the complete toilet envelope depends on actual model geometry. Retail pages may mix package dimensions, family-level ranges and rounded values. Use the dimensioned views in dimensioned side elevation and check their reference points against the field sheet. When two sources disagree, confirm the complete model number, configuration and revision before choosing a value. Do not average conflicting specifications.
Editorial Responsibility & Source Standard
Who prepared this guidance, how it is reviewed, and how readers can challenge or correct it.
BathSpecs Editorial Team
The team organizes manufacturer dimensions into finished-surface measurement steps and flags the conditions that still require installer, designer or code review.
Last reviewed: August 14, 2026
Material specification changes, authoritative guidance updates and well-supported reader corrections trigger another review.
Exact model documents control the purchase
For the complete toilet envelope, BathSpecs prioritizes the current manufacturer specification and installation instructions, then applicable official requirements and documented finished-site measurements. Retailer summaries are treated as discovery aids, not final dimensional authority.